
How to Fix a Grainy Photo — Without Uploading It
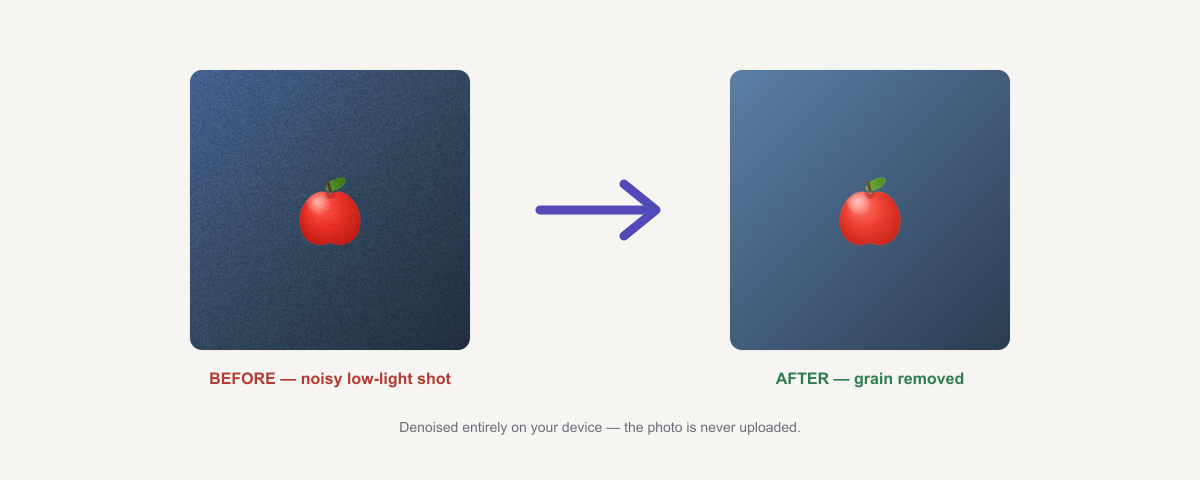
You take the shot at dinner, or at the concert, or of the kids in a dim living room — and when you look at it later it’s covered in coloured speckles. The moment is there, the quality isn’t. That’s digital noise, and the good news is that modern AI denoising handles it remarkably well.
This guide covers how to fix a grainy photo for free and privately: why grain happens, how to clean it up in your browser without uploading the image anywhere, how far the technology can honestly go, and — importantly — when to stop, because the most common mistake is over-correcting until faces look like plastic.
The short version: open the AI photo enhancer, drop in the photo, and let it denoise. It runs on your device, so there’s no upload, no account, and no daily cap. Compare before and after at 100% before you save.
Why photos get grainy
Grain is what a camera produces when it doesn’t have enough light to work with. The sensor amplifies a weak signal, and that amplification brings random speckles with it. In practice that means:
- High ISO. Dim scene, so the camera raises ISO to compensate — and noise rises with it.
- Small sensors. Phone sensors are tiny, so they collect less light than a camera’s. Night mode helps by stacking frames, but it has limits.
- Underexposed shots you brightened later. Lifting shadows in editing amplifies whatever noise was hiding in them. This is one of the biggest causes people don’t realise.
- Heavy compression. Aggressive JPEG saving adds blocky artefacts that look like, and compound with, noise.
- Long-ish handheld exposures, which also tend to add a little motion softness on top.
Knowing the cause matters because it sets expectations. A slightly noisy indoor photo cleans up beautifully. A near-black night shot pushed four stops brighter can be improved, but it will never look like a daylight photo.
Noise, blur and low resolution are three different problems
People lump these together and then wonder why a tool “didn’t work.” They’re distinct, and only one of them is noise:
 Three different faults with three different answers — denoising only fixes the first one.
- Noise (grain/speckles) — random coloured dots across the image. This is fixable. Denoising is genuinely good at it.
- Blur (missed focus or camera shake) — the detail was never recorded. Largely unfixable. Sharpening can fake crispness at the edges, but it can’t recover what the lens didn’t capture.
- Low resolution (too few pixels) — the image is small or pixelated when enlarged. Different tool: that’s upscaling, which you’ll find in the AI image upscaler.
If your photo has both noise and low resolution, denoise first, then upscale — upscaling a noisy image enlarges the noise along with everything else.
How to fix a grainy photo, step by step
1. Start from the best original you have. Use the full-size file straight from the camera or phone, not a version that’s been messaged, re-saved, or screenshotted. Every re-compression throws away detail the denoiser could have used.
2. Open the enhancer and add your photo. Go to the AI photo enhancer and drop the image onto the page. It loads instantly because it’s read locally — nothing is uploaded.
3. Let the AI process it. The first run downloads the model once and caches it; after that it’s quick. The model identifies noise patterns and reconstructs the underlying image.
4. Compare at 100%, not zoomed out. This is the step everyone skips. Noise and over-smoothing are both invisible on a shrunk-down preview. View the before and after at full size and look specifically at skin, hair, fabric and foliage — the fine-texture areas where denoising shows its hand first.
5. Save the result. Export and you’re done. If you also need it larger, send it to the upscaler afterwards; if you need a smaller file for sharing, run it through the image compressor.
Know when to stop: the waxy-skin problem
Here’s the thing most denoising guides won’t tell you: noise reduction always costs detail. The algorithm can’t perfectly distinguish “random speckle” from “fine texture,” so when it removes one it inevitably softens the other.
 Push denoising too far and skin turns to plastic — a little retained grain almost always looks better than over-smoothing.
Push too hard and you get the telltale look: skin like plastic, hair fused into smooth clumps, foliage turned to mush, backgrounds that look painted. It reads as “edited” far more obviously than the original grain did.
A good rule: slightly grainy looks natural; over-smoothed looks fake. Film grain has been an aesthetic choice for a century — nobody has ever admired a waxy face. If you have to choose, leave a little texture in.
Do it without uploading the photo
Most free denoisers ask you to upload your image, and many then cap you — three images a day, or sign up for more. Both are worth avoiding for the same practical reason: the photos people most want to fix are personal ones. Family gatherings, children, pets, a passport photo retake, a picture of a document in bad light.
The enhancer here runs entirely in your browser using your device’s own hardware. The image is never transmitted, so there’s no server copy and nothing to delete later — and no daily limit, because there’s no server cost to ration. You can verify it: open developer tools (F12), watch the Network tab while you enhance, and you’ll see nothing leave your machine. It keeps working offline, too.
How to avoid grainy photos next time
Repair is good; prevention is better, because no tool can restore detail that was never captured:
- Add light. Open a curtain, turn on a lamp, move closer to the window. More light is the whole ballgame.
- Keep ISO as low as the scene allows. Most cameras let you cap auto-ISO.
- Steady the camera — brace against a wall, use a surface or a tripod — so you can use a longer exposure instead of a higher ISO.
- Use night mode on a phone, and hold still while it stacks frames.
- Expose correctly in-camera. Slightly brighter at capture beats brightening a dark file afterwards, which amplifies noise.
Troubleshooting
The result looks smeared or plastic. The denoising was too aggressive for this image. Start from a cleaner original if you have one, and remember some retained grain usually looks better.
It barely changed anything. The problem may not be noise — check whether it’s actually blur (focus/shake), which denoising can’t fix.
My photo is still small/pixelated. That’s resolution, not noise. Denoise first, then use the image upscaler.
The file won’t load. Convert it to JPG or PNG with the image converter and try again.
It’s slow on my machine. Processing happens on your device, so large images take longer on older hardware. Everything after the first run is faster, since the model is cached.
Fix your photo now — privately
Grain is one of the few photo problems modern AI genuinely solves well. Open the free AI photo enhancer, drop in your image, compare at 100%, and save. It’s free, unlimited, needs no account — and the photo never leaves your device.
Related: enlarge it with the AI image upscaler, shrink the file with the image compressor, or browse all AI tools.
Frequently asked questions
How do I fix a grainy photo for free?
Open the AI photo enhancer, drop in the image, and let it denoise. It runs in your browser, so it's free, unlimited, and your photo is never uploaded.
Why are my photos grainy?
Grain (digital noise) appears when the camera doesn't get enough light — high ISO, dim rooms, night shots, or small phone sensors. Heavy JPEG compression and brightening dark photos in editing both make it worse.
Can AI really remove noise from a photo?
Yes, modern denoising is very effective on moderate noise. But it works by smoothing and reconstructing, so it trades some fine detail for cleanliness. Extremely noisy photos can be improved but not made perfect.
Will denoising make my photo blurry?
Over-denoising can, yes — it's the classic waxy, plastic look, most visible in skin and hair. If the result looks smeared, the original detail was lost to the noise reduction; a lighter touch keeps more texture.
Is denoising the same as upscaling?
No. Denoising removes grain; upscaling increases pixel dimensions. They solve different problems and are separate tools — though a noisy photo should usually be denoised before upscaling.
Can it fix a blurry photo too?
Not really. Blur from a missed focus or camera shake means the detail was never recorded, and no tool can invent it convincingly. Denoising fixes grain, not focus.
Does my photo get uploaded?
No. The enhancer runs entirely in your browser using your device's own processing, so the image never leaves your computer — worth caring about for family photos, kids, or ID shots.
Is there a daily limit?
No. Many free denoisers cap you at a few images per day or require an account. This one is unlimited, with no sign-up and no watermark.
What file formats work?
JPG, PNG and WebP. If your photo is in another format, convert it first with the image converter.
How do I avoid grainy photos in the first place?
Give the sensor more light: brighter conditions, a wider aperture, a steadier shot with a longer exposure, or a lower ISO. Prevention beats repair — denoising can't restore detail that was never captured.